The intent is to demonstrate how to create a PivotTable in a PowerPoint show such that the presenter can interact with the PT during a slide show. This also includes the ability to update the slide with updated information during the presentation.
Click on the thumbnail on the right to see a snapshot of an interactive PivotTable during a slide show.
The concept documented below also applies to the use of a PivotChart or any other object that has a data connection supported by your computer. Look at the various options in the Provider tab of the Data Link Properties in step 4 below.
While the methodology allows one to interact with a PivotTable during a slideshow, it is only fair to alert the reader that performance may not be all that great. On my computer, with other tasks running in the background, the display of the table during a slide show as well as interactions with it were rather sluggish.
 |
| 1) Start with a blank slide.
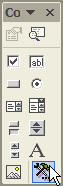
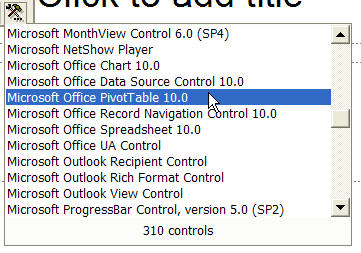
Access the Control Toolbox toolbar (View |
Toolbars ► Control Toolbox). From the Control Toolbox, click the 'Additional Controls' button as shown on the right; in the pop up scroll box, select the Microsoft Office PivotTable 10.0 control.
|
|
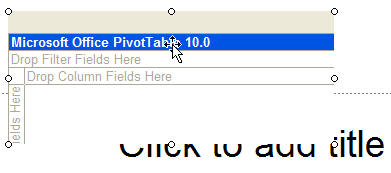
| 2) The object on the right will appear in the slide. Right-click on it and select Microsoft Office PivotTable 10.0 Object ► Edit | 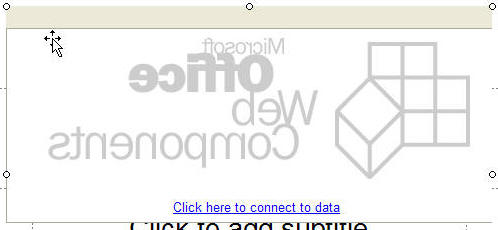 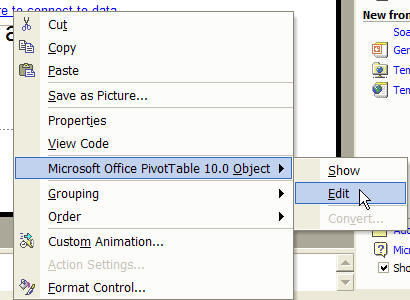 |
|
| 3) In the resulting Microsoft Office PivotTable 10.0 Properties dialog box, in the Data Source tab, in the Get Data Using section, select the Connection option and click the Edit... button | 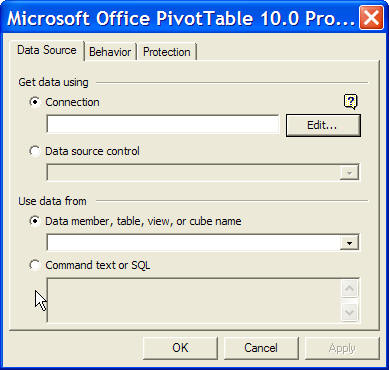
|
|
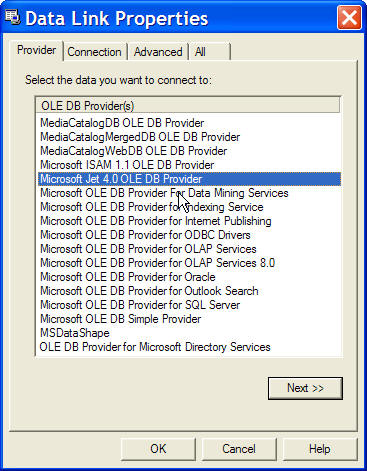
| 4) In the resulting Data
Link Properties dialog box, in the
Providers tab select Microsoft Jet
4.0 OLE DB Provider.
Depending on the database that you will be
using you might have to use a different driver.
|
|
|
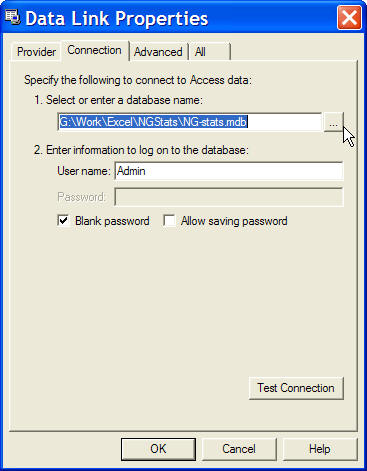
| 5) In the
Connection tab, click the
... button, and find the database
of interest. If your database system requires authentication, provide the User Name and Password. To verify the connection click the Test Connection button. If you have problems, please contact your local IT admin. Given the unique peculiarities of how database access can be configured it is close to impossible to carry out generic troubleshooting. Click OK to complete this dialog box. |
 |
|
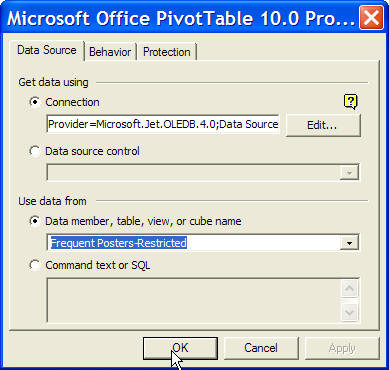
| 6) Back in the Microsoft
Office PivotTable 10.0 Properties dialog box (which is still
open), in the Use Data From
section, select the Data member, table,
view, or cube name option and select the query or table
of interest from the drop-down box.
If you have your own SQL code, select the
Command Text or SQL option and
enter your code in the available field.
OK to close the open dialog box |
 |
|
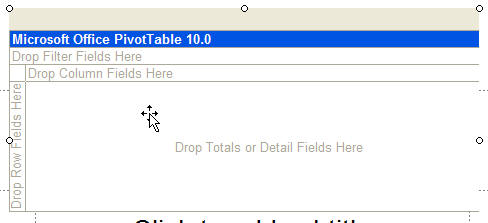
| 7) Back in PowerPoint, note
that the object looks somewhat different. It is starting
to look like a PivotTable in Excel (see below). Resize it
to make more of it visible as shown on the right.
|
|
|
| 8) Right-click on the object
and select Microsoft Office PivotTable
10.0 Object ► Show. The object will open and it
will look even more like the familiar Excel interface.
However, it is important to note that the
Office PivotTable control is not the same as Excel.
Consequently, this control will not behave exactly the same as
an Excel PivotTable and you may encounter differences in
functionality.
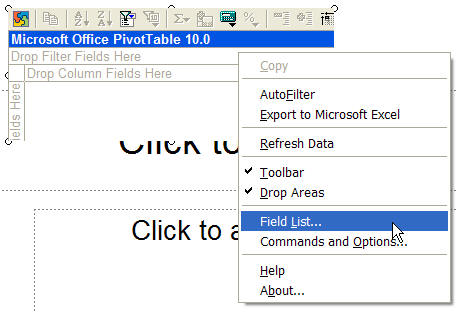
Right-click and select Field List... Set up the fields like you might for an Excel PivotTable. Once again, please keep in mind that this control will not behave exactly the same as an Excel PivotTable and you may encounter differences in functionality. |
 |
|
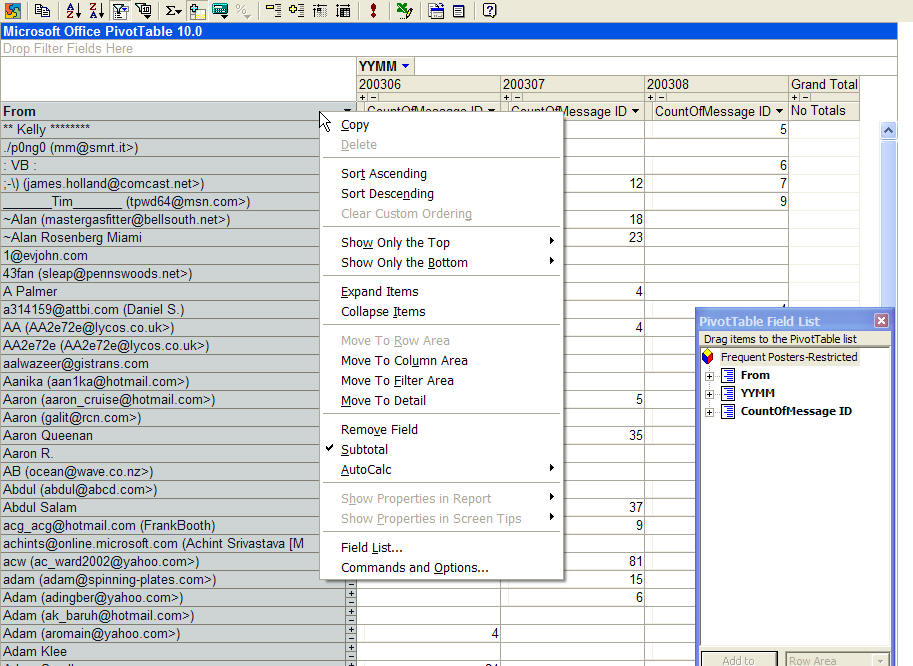
| 9) The image on the right is
a thumbnail of the slide during a Slide Show.
The presenter can interact with the PivotTable at this time! The field list is visible in the lower right side of the slide. Also visible is the right-click menu. As the second image on the right demonstrates, click the ! button, i.e., the Refresh button, and PowerPoint will retrieve up-to-date data from the database. |
|
|
|
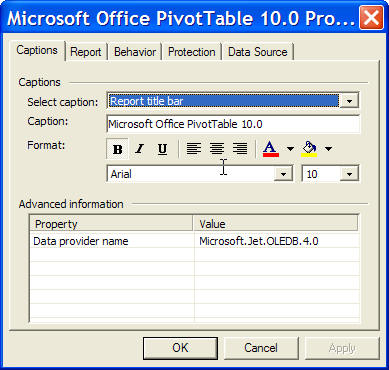
Making changes Right click on the PivotTable object and select Microsoft Office PivotTable 10.0 Object ► Edit. However, when compared to the dialog box in Step 3 above, this Microsoft Office PivotTable 10.0 Properties dialog box has a few additional tabs. Please explore the various options as and when the need or opportunity arises. |
 |
|
|
Keywords: PivotTable, PivotChart, Pivot, Table, Chart, ODBC, database, PowerPoint, Excel, OWC, Office Web Components, slide show, query, table, interactive |